

|
|||||||
| C30 / S40 & V50 '04-'12 / C70 '06-'13 General Forum for the P1-platform C30 / S40 / V50 / C70 models |
 Information
|
|
Tom Tom MountViews : 6952 Replies : 16Users Viewing This Thread : |
 |
|
|
Thread Tools | Display Modes |
|
|
#11 | |
|
New Member
Last Online: Aug 21st, 2011 09:59
Join Date: Mar 2010
Location: Nottingham
|
Quote:
I'm still looking at the issue of hardwiring.
__________________
2010 V50 R-Design SE 2.0d Powershift, in Brilliant Blue. |
|
|
|

|
|
|
#12 |
|
VOC Member
Last Online: Nov 6th, 2016 10:18
Join Date: May 2009
Location: Blackpool UK
|
Note to Mods/ Admin, I am in no way associated with TomTom or Brodit and this post is intended to show what can be done to avoid windscreen mounting a Sat Nav in your car.
Here is one option to consider and it provides a cheap but very secure mount for the TomTom in the car, the real plus point if you do this is that the Brodit kit will fit various TomTom car mounts that are supplied with the units making any Sat Nav upgrade a rather easy option. The Brodit Ball used in this post can be used to fit the following TomTom devices: Start, Ease, One Third Edition, One XL, All XL using the Easy Port mount, All One devices using the Easy Port Mount, Go-x20, Go-x30, Go-x40, Go-x50 and at a guess looking at the press pictures of the Go-1000 it will probably fit that as well but no way of confirming this until the unit goes on sale. With such a range of devices that will work with the Brodit "Ball" it offers a cheap and secure quality mount that will fit fit most Volov's (if not all) and gives you the option to upgrade the TomTom without spending a fortune on model specific mounts. If anyone needs specific instructions on how to modify their TomTom mount to work in the way shown in this post simply ask and I will add a guide detailing the specific nav device. First of all you will need a Pro-Clip to suit your car and brodit "Ball" attached to the Pro-Clip, I would suggest you attach these two components before fitting this to the car, as it avoids slipping with the screwdriver and damaging the trim of the car! In addition you need the TomTom supplied windscreen mount to act as a donor for the device specific addaptor.  Using a small screwdriver inserted to the small cut out visible in the center disk of the TomTom mount simply lever/ flick out the disk:  Once the center disk is removed four Phillips head screws are revealed, remove these with a suitable size driver (the screw heads are rather shallow and small, don't loose the screws as they will be needed later). The rear cup will now float free and can be pushed down the stem of the mount:  First of all remove the part that is fitted around the ball, secondly remove the rear collar which will take a little force to seperate the assembly, by now you should have a pile of bits looking similar to this:  Push the rear collar over the Brodit ball:  Attach the square section of the TomTom mount to the rear collar using the four screws removed earlier:  Re-fit the center cover by pushing it back in to position:  Next we move to the car, this is the assembled x20/ x30 Brodit addapted mount in my Ovlov V70:  Finally with the device attached, note the power cable is routed through the air vent to avoid having wires all over the inside of the car:  Avoids the costly purchase of an active mount with all the security of a physical attachement to the dash structure that doesn't rely upon suction cups - Mike |
|
|

|
|
|
#13 |
|
VOC Member
Last Online: Nov 6th, 2016 10:18
Join Date: May 2009
Location: Blackpool UK
|
I decided I had seen enough of all those cables strewn about the car and decided to tidy it all up, now where have I heard that before??? This covers both a TomTom PND and my iPhone:
Having removed the central air vent from the car I set to with a Dremel to cut a small access hole for the cables that were going to the TomTom 940, in this case the power lead, audio line out and the RDS-TMC round style plug  The three cables are easily fed through the newly made hole, any V70 owners should note the area I cut through is doubled skinned so you need to make two cuts and if you remove the Climatic Control Panel do not disconnect it or the car will throw an airbag fault.  Feeding the cables through the airvent was good fun, in the end I took the vent to bits and put the cables through where I needed them before reassembling the vent afterwards, fiddly but not impossible, the trick is to only put the power cable through one opening and the othe other two cables through an adjacent vent hole. Doing this lets the airvent still operate correctly and spreads the cables ready to connect to the 940 mount. 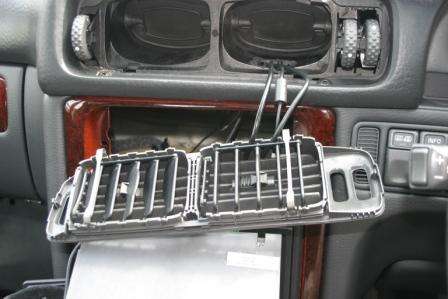 As I had most of the dash trim out of the car for access and I hate wires in the car I decided to sort out the iPhone cables at the same time, the power connector for the iPhone is easily removed from the Brodit holder by releasing the two screws on the rear of the phone holder, this makes it much easier to push the cable with connector through any available gaps in the trim. 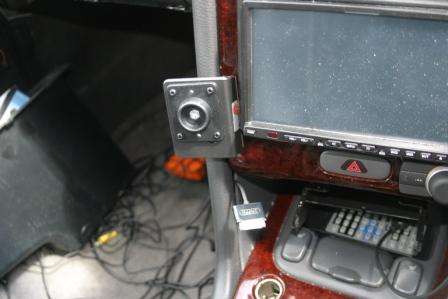 Push the connector back in to position within the Brodit mount then resecure using the closure plate and two screws. 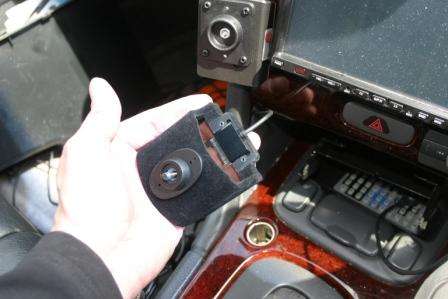 Resecure the Brodit Active holder to the swivel coupling by tightening the center screw, only finger tight is needed though, any more than this will snap the plastic on one part of the ball joint.  I pulled out the stereo to gain access to certain connections, firstly the RDS-TMC receiver needed connecting to the car aerial cable via a splitter cable I made a while ago (detailed in This Thread).  I was also fitting a three way 12V outlet socket to power the TomTom charger and iPhone power addaptor, the feeded wires to this were simply tagged to the stereo ignition switched power wires using Scotch locks. 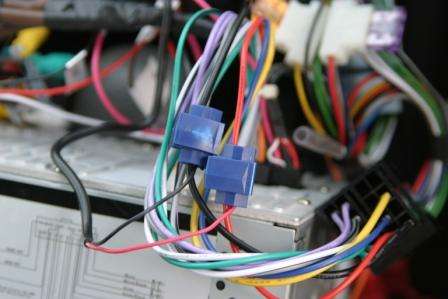 At this point its worth checking the power is working correctly so I switched it all on and got indications of charge for both the 940 and the iPhone so it was time to start tidying up. 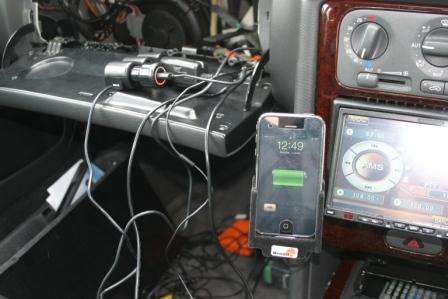 Before burying all of this I taped up the power addaptors so they couldn't migrate out of the sockets due to vibration and/ or thermal creep - easy to do just bind them together with PVC tape. 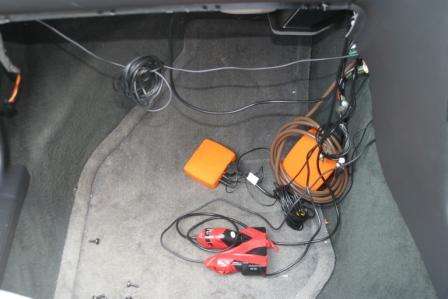 The power addaptor was then secured to the underside of the glovebox support bracket with more tape, it looks a little unsightly but once the cars back together non of this will be seen. The orange boxes are part of the iO-Play device I added to the car for decent Handsfree support, this is detailed in This Thread, the boxes get hidden when the trim is replaced. 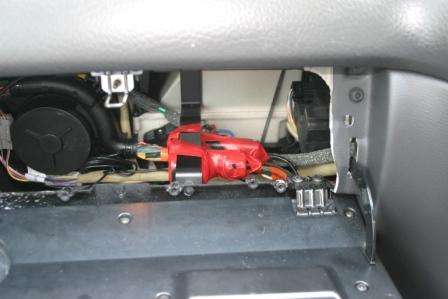 I added a new cable to the stereo during this install which adds iPOD support to the stereo, whilst I probably don't need this (yet) it saves taking the whole lot out again to add a simple cable, this is nothing to do with the TomTom but adds iPOD input to the stereo and offers full control of a device plugged in to it. I decided against using this with the iPhone as I have a Bluetooth module for that which negates the need for cables.  All cabled up and working - Oh look no wires and remember this includes an RDS-TMC receiver, much neater even though it did take a few hours. 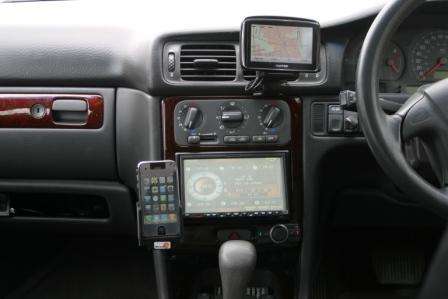 With the 940 off its bracket all that is left is a simple shoe that is pre-wired and ready to go once the device is dropped in to position.  The iPhone holder also attracts less attention as there are no tell tale wires going to it strewn all over the car. 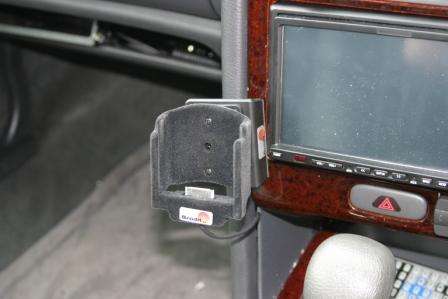 Next job is to vac out the inside of the car, bits of black plastic dust have got all over from the cutting job, but overall I am happy with the installation and the flexibility I get from the kit - Mike |
|
|

|
| The Following User Says Thank You to mikealder For This Useful Post: |
|
|
#14 |
|
Junior Member
Last Online: Jul 21st, 2014 22:41
Join Date: May 2010
Location: Worcester
|
RegG,
Here's the mount with and without the unit. Cable is holding in place Ok at the moment. |
|
|

|
|
|
#15 |
|
Junior Member
Last Online: Jul 21st, 2014 22:41
Join Date: May 2010
Location: Worcester
|
Thanks, mikealder. I think that's a bit beyond my ability! Good ideas, though.
|
|
|

|
|
|
#16 |
|
VOC Member
Last Online: Nov 6th, 2016 10:18
Join Date: May 2009
Location: Blackpool UK
|
Just follow the bits about powering up the nav unit then, fit a ciggy socket under the dash then plug the TomTom supplied car charger in to it, tape it up so it doesn't fall out. Next work out a way to get the lead out adjacent to where the nav unit is mounted and plug it in - Mike
|
|
|

|
| The Following User Says Thank You to mikealder For This Useful Post: |
|
|
#17 | |
|
New Member
Last Online: Aug 21st, 2011 09:59
Join Date: Mar 2010
Location: Nottingham
|
Quote:
 Reg
__________________
2010 V50 R-Design SE 2.0d Powershift, in Brilliant Blue. |
|
|
|

|
 |
| Tags |
| electrics, mounts, satnav, v50 |
| Currently Active Users Viewing This Thread: 1 (0 members and 1 guests) | |
|
|